
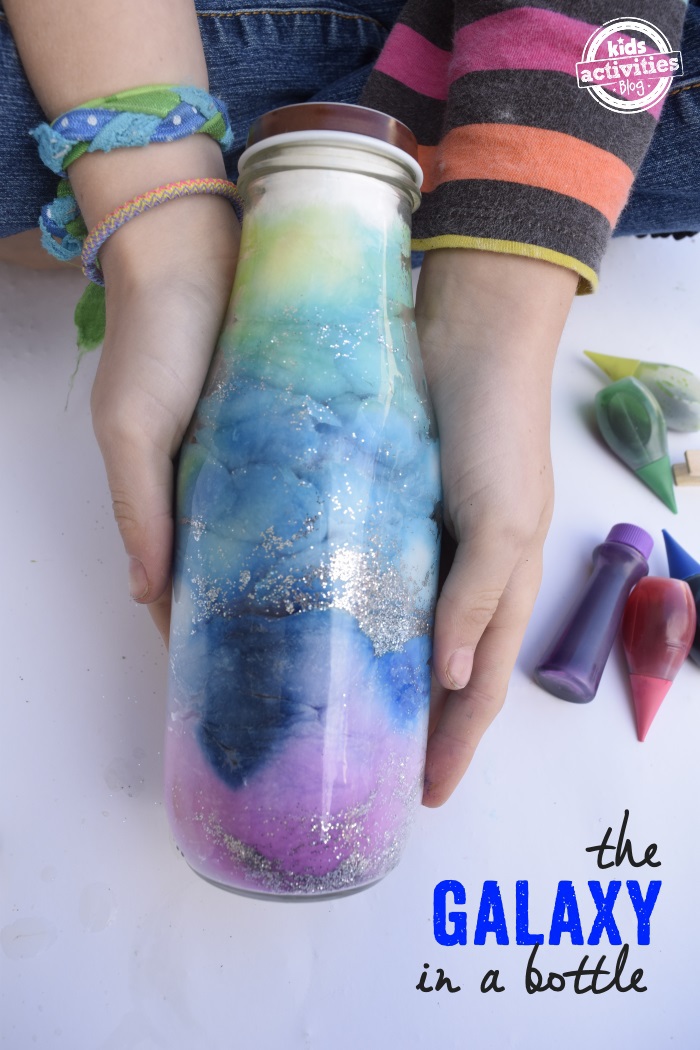
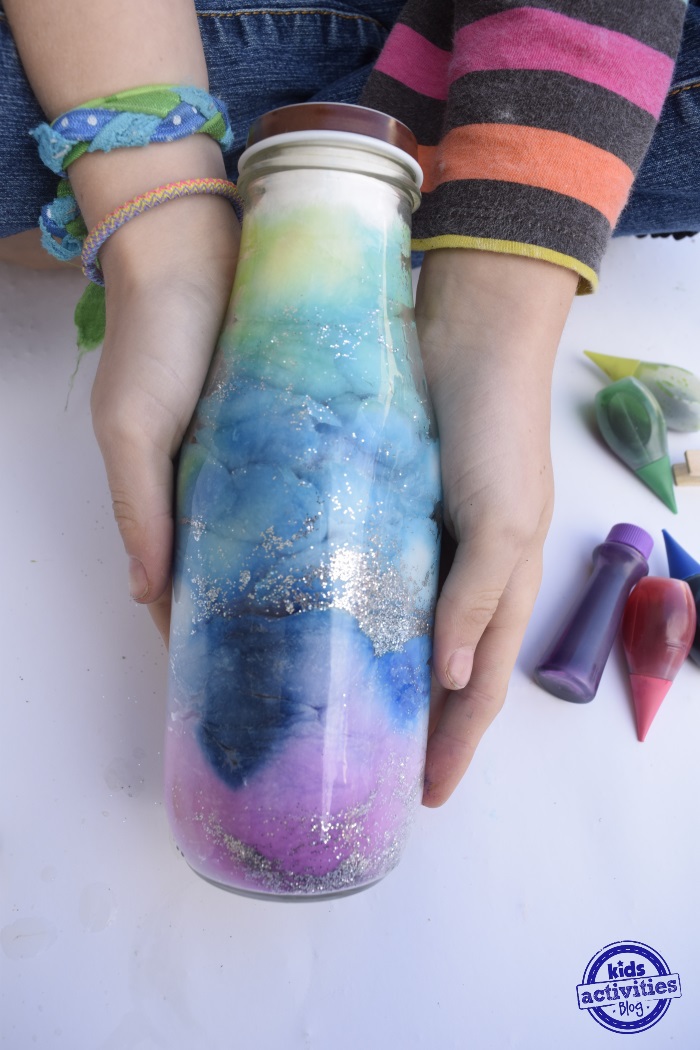
Galaxy Jars also known as Sensory bottles or calm down jars are fun for kids, but what if your kids, no longer call themselves “kids”? But they still love crafts? This galaxy glitter jars project is the sensory bottle that is a gorgeous craft for kids of all ages.
Let’s Make a Galaxy Jar
This glowing galaxy in a jar is fun and easy to make – the more “grown-up” version of our Counting Stars Glowing Bottle, do not require mom’s involvement (even younger elementary kids can make them independently) and the finished product is great to put on display near a bed.
Related: Our Counting Stars Glowing Bottle Craft
Follow the easy step by step instructions below to make this fun craft filled with layers of cotton balls all the different colors of the galaxy night sky.
This article contains affiliate links.
Supplies Needed for Sensory Bottle Craft
- Clear glass bottle with a lid – glass jar, glass milk bottle, other clear recycled bottle or a mason jar work great
- Cotton balls – lots and lots of cotton balls
- Glitter
- Food Dye
- Water
- Glow in the dark paint
How to Make Your Own DIY Galaxy Jar Craft
Step 1
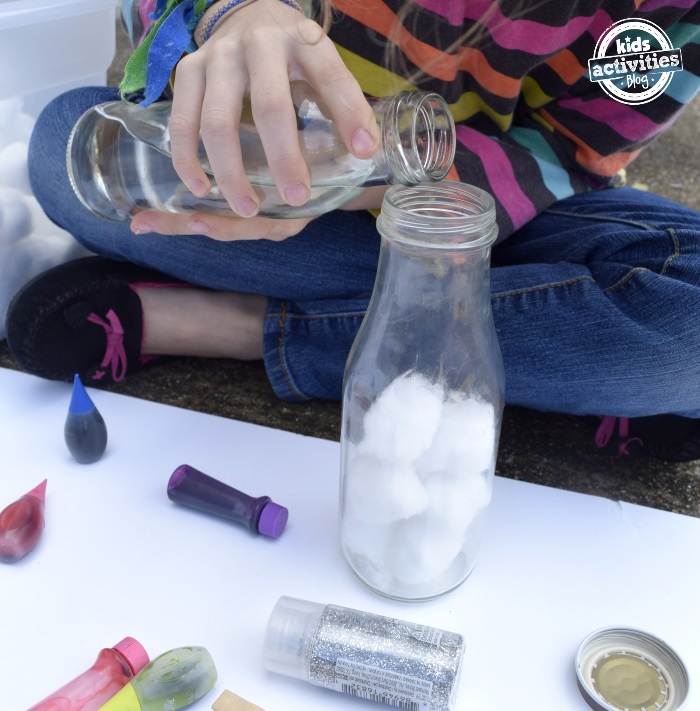
Fill your bottle half-full with cotton balls. You will compress the cotton balls into the bottom of the jar – they will fill the lower inch of the bottle when you are finished.
Step 2
Pour some water into the bottle, enough to saturate the cotton balls.
Step 3
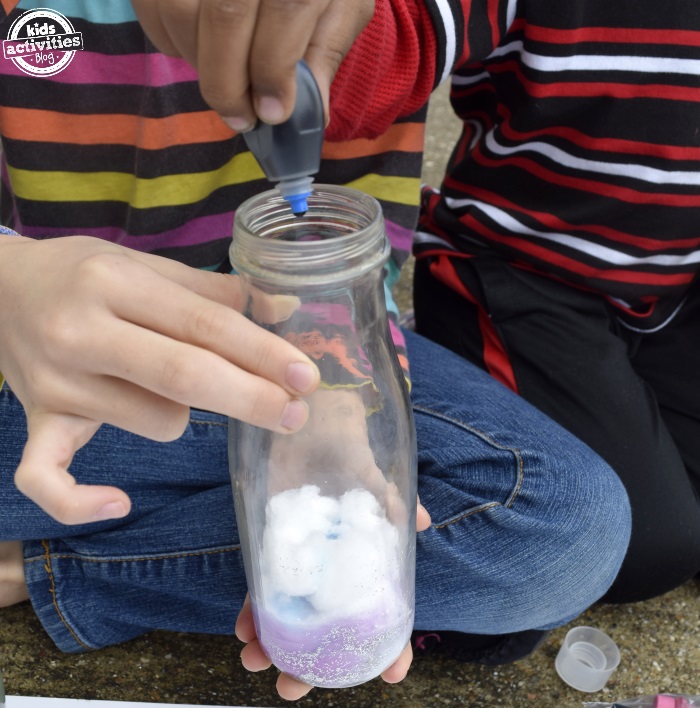
Drip 2-3 drops of food coloring into your bottle. Add a squirt of glow paint and a dash of glitter.
Step 4
Then – do it all again! Repeat step instructions: Add more cotton balls, more water, sprinkle glitter and glowy juice.
Keep adding new colors and new layers until your bottle is completely full.
Tip from Our Experience Making this Sensory Jar Craft
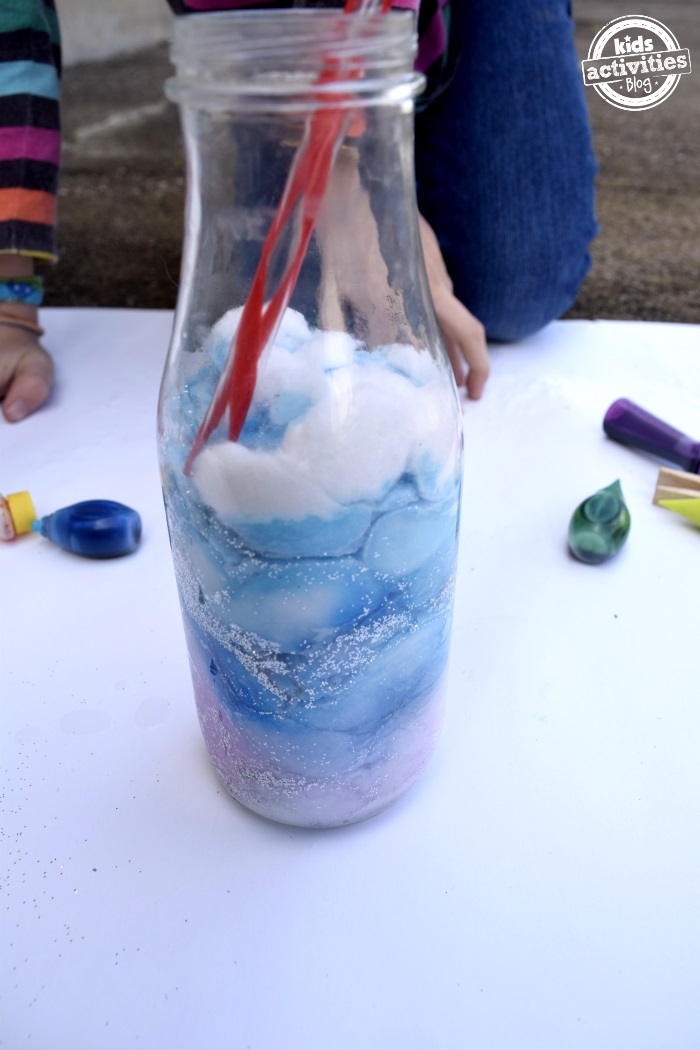
We found that as the layers grow it gets harder and harder to fill the jar. Using a stiff straw or wooden sticks to tamper the cotton balls back down into their layer helps.
Step 5
Put the lid on your bottle securely.
How to Keep Your Galaxy Jar Fresh & Glittery
As your bottle ages, you will want to rehydrate the cotton balls to keep the blurred “sky look”.
Set the bottle on your windowsill to allow the glow paint to charge. As your kids drift to sleep they will see a sky, including a glittery milky way looking back at them, from their own galaxy bottle.

Galaxy Jar Makes Great Kid Made Gift or Group Activity
My tween is making these for all of her friends for their Homemade Christmas Swap get together. She is collecting glass bottles!
We have also used this galaxy jar craft as a slumber party craft idea. Then everyone can calm down for bed at night {giggle} and have a souvenir they made home with them the next day to remember the party fun.
Even though a sensory jar would normally be thought of as a sensory activity for younger kids, older kids – teens and tweens – need stress relief too! It can be calming to have a coping mechanism like our dark galaxy jars as a calm down jar for kids of all ages…pssst…and adults!
Galaxy Jar Craft
Kids of all ages (even older kids) will love making their own galaxy jar filled with sparkle and starry night sky fun. This easy craft can be used as a sensory tool like a calm down jar.
Materials
- Clear glass bottle with a lid – milk bottle, other clear recycled bottle or mason jars work great
- Cotton balls – lots and lots of cotton balls
- Glitter
- Food Dye
- Water
- Glow in the dark paint
Tools
- wooden stick, spoon or stiff drinking straw
- cup of water
Instructions
- Fill the bottom of the jar with cotton balls until your bottle is 1/2 full.
- Pour some water to saturate the cotton balls.
- Add 2-3 drops of food coloring, squirts of paint and some silver glitter.
- Repeat the process over and over again adding new layers of cotton and different color paint and food coloring to give your bottle a dark galaxy glow.
- When necessary use a stick, spoon or straw to push the cotton balls compacting them to the bottom of the mason jar.
- Add lid.
Notes
To refresh your galaxy jar in the upcoming weeks, add some water.
What are the benefits of DIY sensory bottles?
DIY sensory bottles offer a mix of relaxation, learning, and creativity, making them a great activity for kids to enjoy.
- Calmness: DIY sensory bottles help kids feel calm and relaxed. The colors and the things moving inside the bottle move can help sensory-seeking kids feel peaceful and happy.
- Focus and Fun: Making and playing with DIY sensory bottles helps kids focus and have fun. Explore the different objects inside, shake the bottle, and see how everything moves. It’s like a mini science experiment!
- Creativity and Sharing: DIY sensory bottles are a way to be creative and express ourselves. Choosing colors, objects in the bottle, and how they will go together in the container creates a colorful, unique finished piece to enjoy alone, like this glowing bedtime galaxy bottle. And to share with others, like this glittery DIY sensory bottle.
Can I customize sensory bottles for specific sensory needs?
Yes, you can make sensory bottles that are just right for specific sensory needs. That means you can create them to help with things like sight, sound, and calming down. Here’s how you can customize them:
Sight: Choose bright and colorful objects to put in the bottle. You can add glitter, sequins, or colored water to make it visually interesting and stimulating.
Sound: Put things in the bottle that make noise when you shake it. This can be small bells, beads, or rice. It’s fun to listen to the sounds they make!
Calming: If you want the sensory bottle to help you relax, choose things that move slowly inside. Slow-falling glitter or gently swirling liquids can create a calming effect when you watch them.
Sensory Integration: You can combine different sensory elements in one bottle. This means adding things that look interesting, make sounds, and feel nice when touched. It helps your senses work together and feel balanced.
Are you concerned about sensory processing issues? You can learn more about how to support your child at home with these sensory processing ideas.
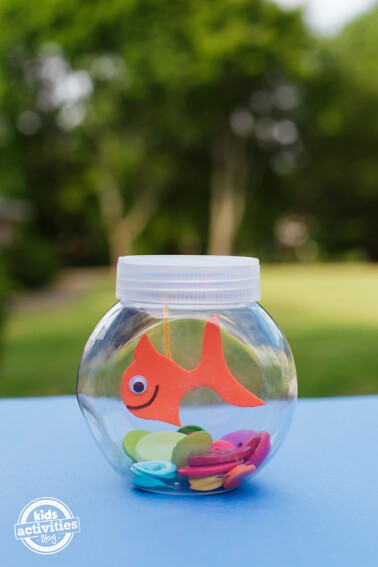
What are some ideas for different types of DIY Sensory Bottles?
Need some ideas to DIY your own sensory bottles? Perhaps the most important thing is to consider your child’s interests and needs and develop a DIY sensory bottle just for them!
- Floating Flower Garden: Fill a bottle with water and add colorful flower petals. Watch as the petals float and create a beautiful garden scene.
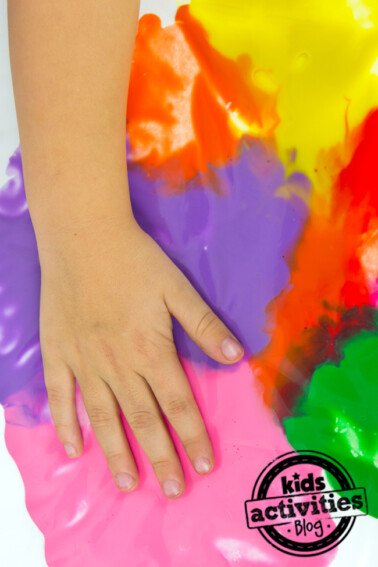
- Color Mixing Bottle: Fill one-third of the bottle with water, then add oil and food coloring in different colors. When shaken, the colors mix and create new shades.
- Magnetic Bottle: Fill a bottle with sand or rice and add small magnetic objects. Use a magnet to move the objects around and explore the magnetic properties.
- Nature Sounds Bottle: Fill a bottle with dry rice or beans and add small natural items like pinecones or pebbles. Shake the bottle to create soothing nature sounds.
- Sensory Sand Bottle: Layer colored sand in a bottle to create a visually appealing and textured sensory experience.
- Glitter Galaxy Bottle: Combine water, glitter, and glow-in-the-dark stars to create a mesmerizing galaxy-themed sensory bottle.
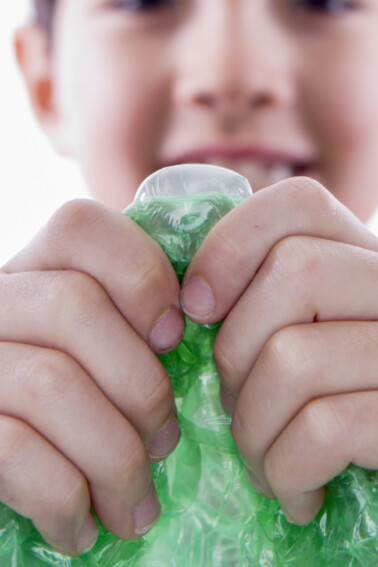
- Bubble Wrap Pop Bottle: Cut small pieces of bubble wrap and place them inside the bottle. When you squeeze the bottle, the bubbles pop and create a satisfying sensory experience.
- Seashell Discovery Bottle: Fill a bottle with sand and small seashells. Shake the bottle and explore the textures and sounds of the shells.
- Rainbow Rice Bottle: Dye rice in different colors using food coloring and layer them in a bottle. Children can tilt and turn the bottle to create a colorful display.
- Sensory Beads Bottle: Fill a bottle with water and add water beads. Watch as the beads expand and change texture, providing a tactile sensory experience.
- Feather Float Bottle: Fill a bottle with water and add small colorful feathers. Tilt the bottle and watch the feathers gracefully float and move.
- Sensory Smell Bottle: Add scented oils or spices to a bottle and secure the lid tightly. Children can smell and identify different scents.
- Weather Sensory Bottle: Create a weather-themed sensory bottle by combining cotton balls (clouds), water (rain), and small plastic sun or lightning bolt shapes.
- Ocean Wave Bottle: Fill a bottle with water, blue food coloring, and oil. When you tilt the bottle, it creates the illusion of rolling ocean waves.
- Sensory Alphabet Bottle: Add small foam letters to a bottle filled with water or clear gel. Shake the bottle and find letters to practice letter recognition.
- Dinosaur Excavation Bottle: Fill a bottle with sand and bury small dinosaur figurines inside. Children can shake the bottle and try to find the hidden dinosaurs.
More Galaxy Crafts from Kids Activities Blog
- Make galaxy slime that is colorful and sparkly like the stars at night.
- This homemade glitter play doh recipe is a galaxy play dough that is as pretty as it is fun to play with.
- Here are some fun kids galaxy crafts that you don’t want to miss!
- Make a galaxy night light for your room.
- Galaxy melted crayon art that turns into really sweet homemade galaxy valentines.
- Let’s make galaxy cookies to eat while we craft!
- Our galaxy board game is one of the best free printable games for kids!
- And no galaxy would be complete without a solar system model for kids…you can print and make that today!
- Check out these great galaxy crafts that will keep your kids busy!
How did your DIY galaxy jar turn out?


0