
Looking for a creative way to gift money? Let’s learn how to use dollar bills to make dollar origami pants for birthdays, graduations, and other celebrations. In 9 simple steps, you can make dollar bill pants in a fun and easy way.

Our money origami pants tutorial is a fun craft for kids of all ages. If you or your kids have experience folding origami, the first steps will be really easy. The best part is that even if this is your first time, the steps are still very easy as long as you follow the photo instructions.
Tip: Make a money origami shirt to go with this pair of pants!
Instructions:
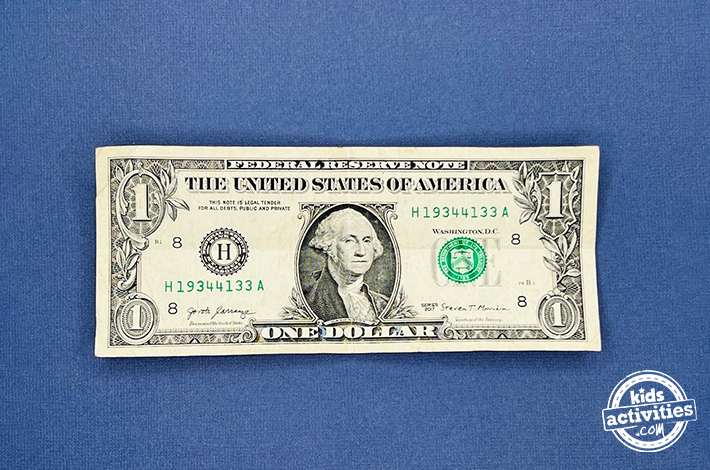
Step 1:
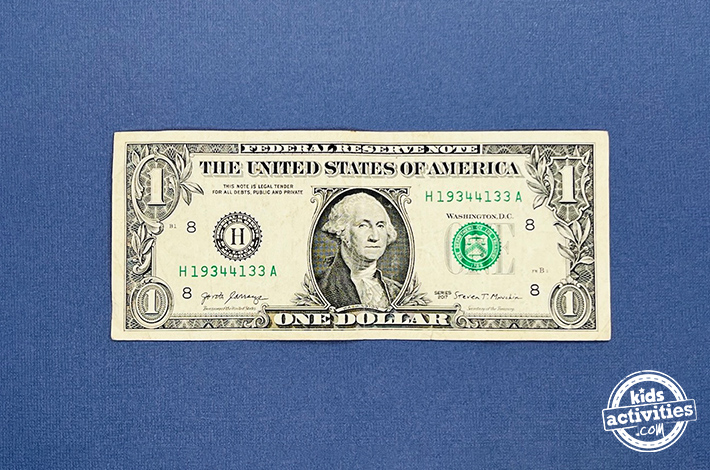
Take a crisp dollar bill and fold it in half lengthwise and then crosswise. Gently unfold to create a neat crease.
Step 2:
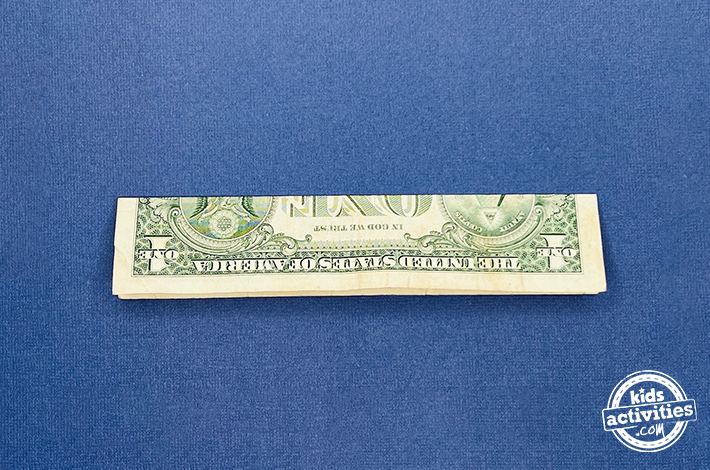
Bring the top and bottom edges forward towards the center crease formed in the previous step.
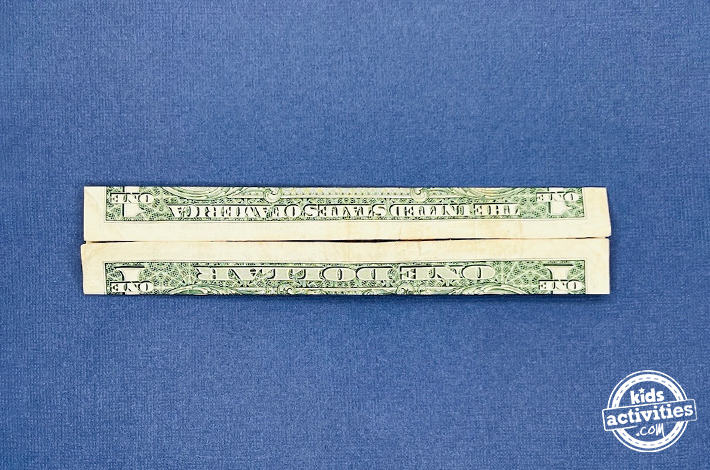
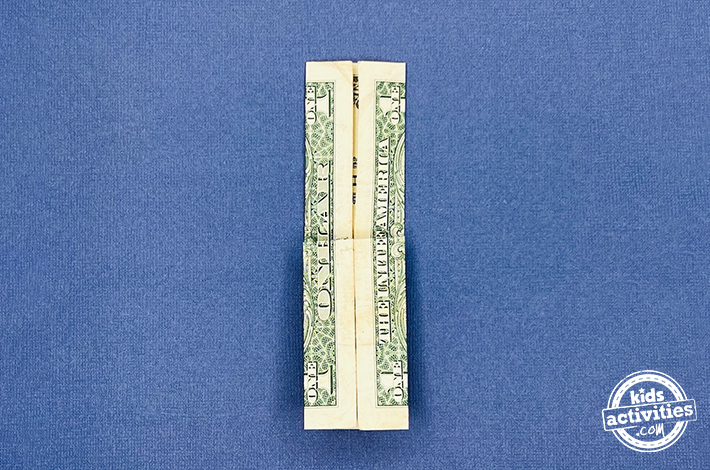
Step 3:
For the next step, fold the bill lengthwise following the indicated lines.
Step 4:
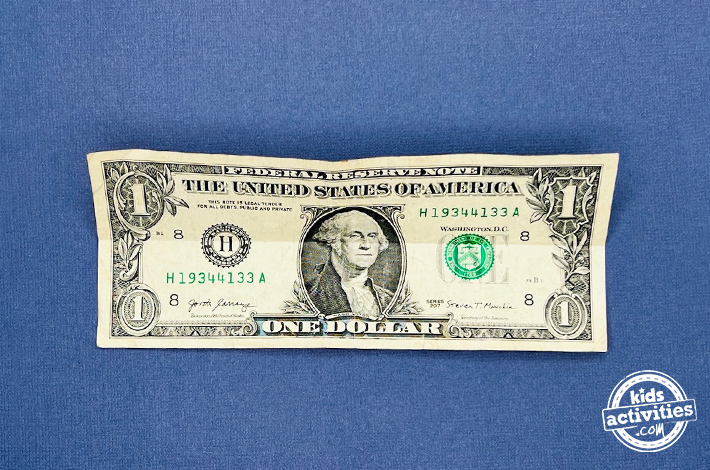
Rotate the figure so that the fold from the previous step is at the bottom, with the free edges at the top.
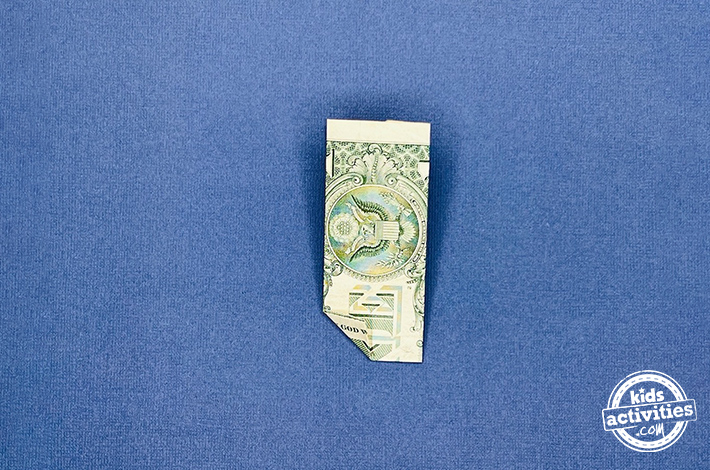
Step 5:
Fold the bottom left corner up, then unfold it to create a crease. Use this crease to tuck the corner neatly between both layers of the bill. Repeat with the lower right corner.
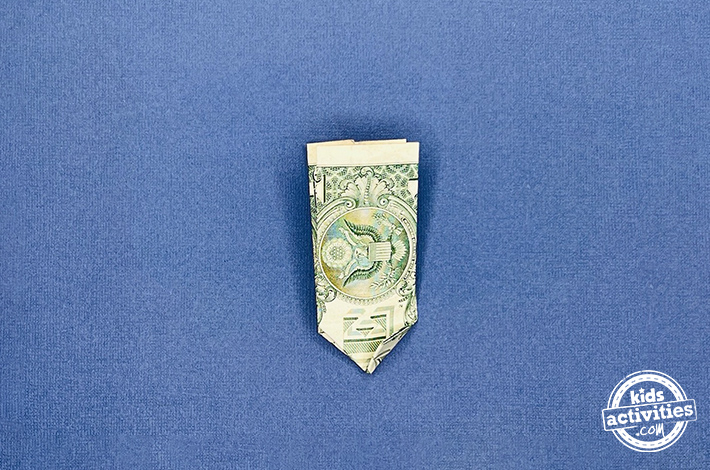
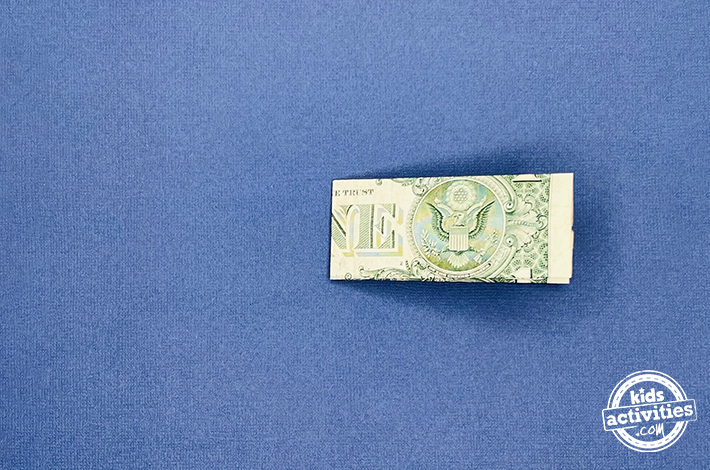
Step 6:
Fold the top layer down, leaving a triangular flap underneath. Flip the shape over and repeat this step on the other side of the bill.
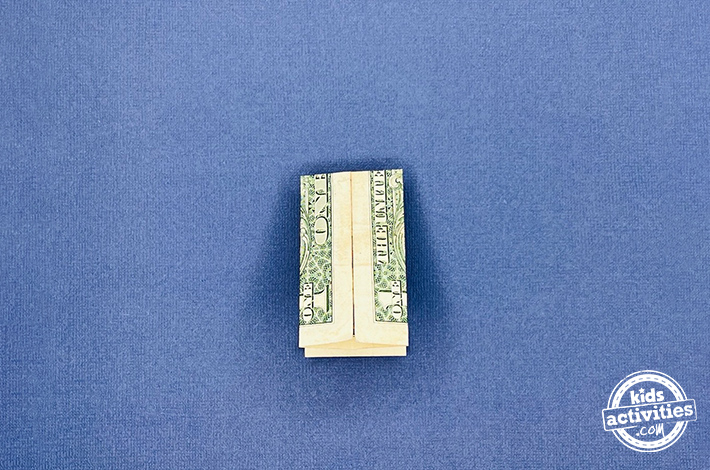
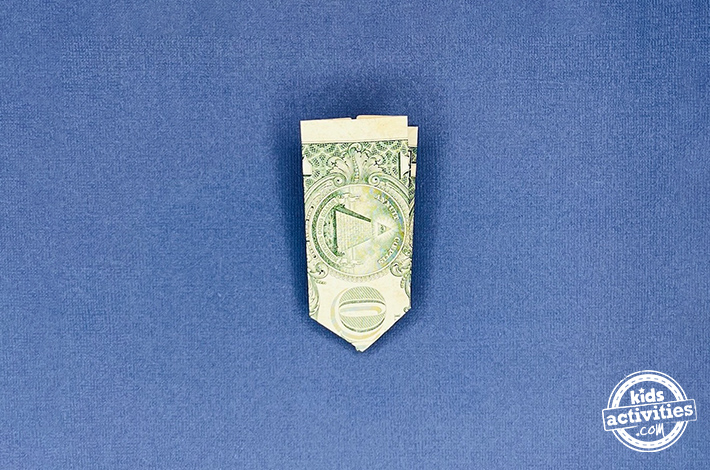
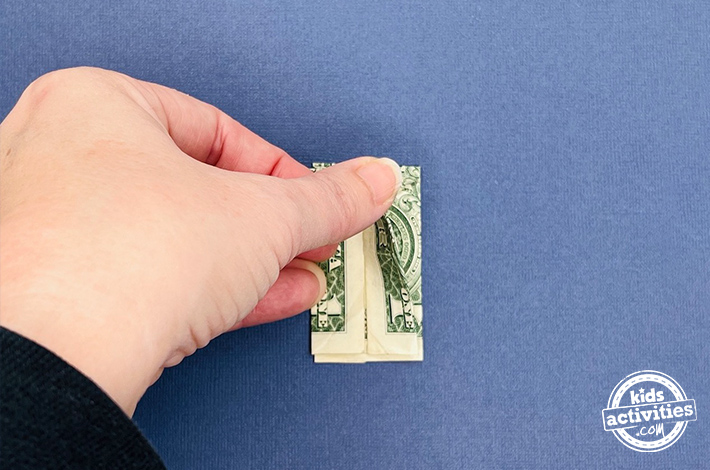
Step 7:
Fold the top layer in half, ensuring both sides are symmetrical. Flip the figure and repeat this fold on the other side.

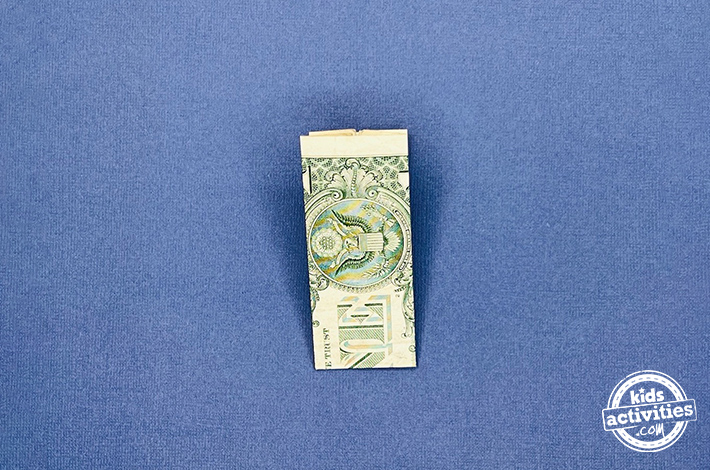
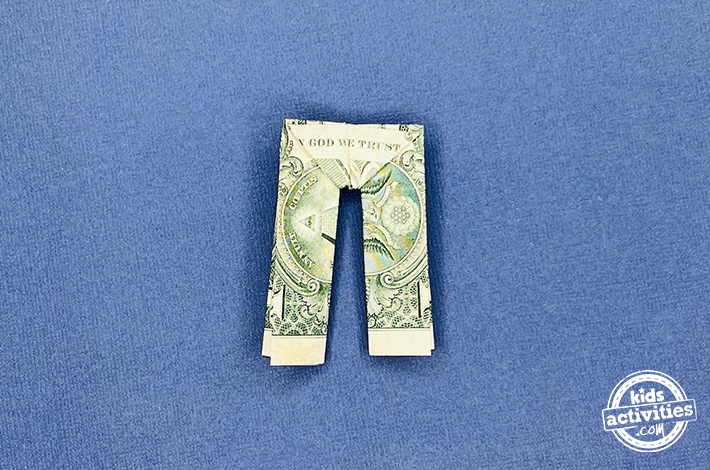
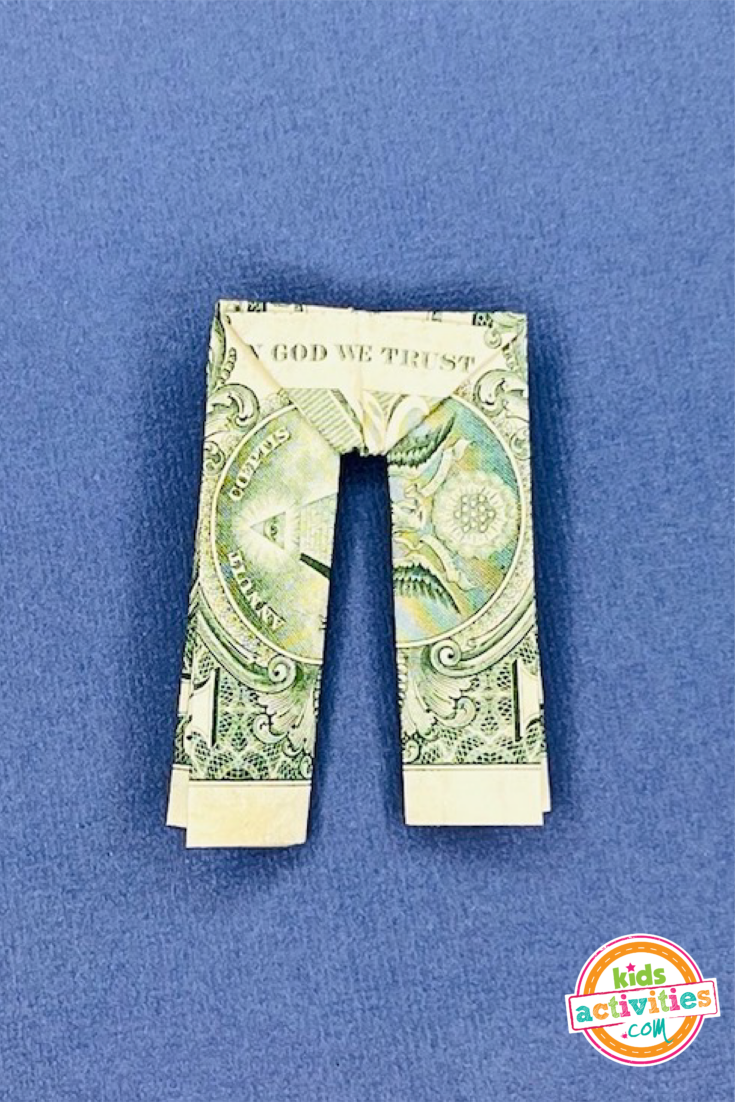
Step 8:
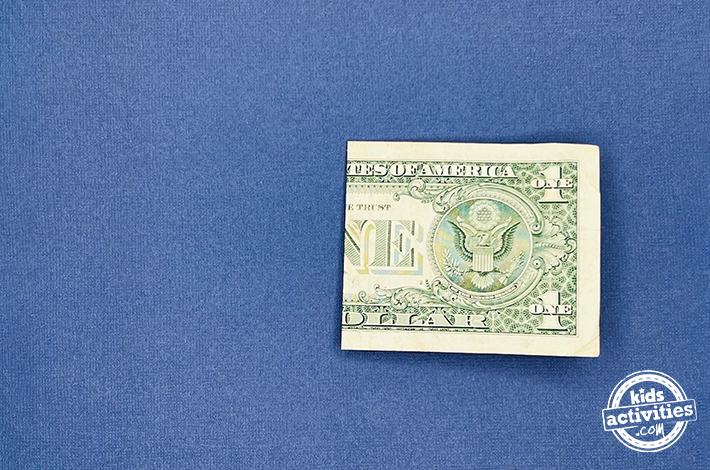
Voila! Your stylish dollar bill origami pants are ready to display.
Dollar Bill Origami Pants
Make stylish and fun dollar bill origami pants with one dollar bill!
Materials
- One dollar bill.
Instructions
- Take a crisp dollar bill and fold it in half lengthwise and then crosswise. Gently unfold to create a neat crease.
- Bring the top and bottom edges forward towards the center crease formed in the previous step.
- For the next step, fold the bill lengthwise following the indicated lines.
- Rotate the figure so that the fold from the previous step is at the bottom, with the free edges at the top.
- Fold the bottom left corner up, then unfold it to create a crease. Use this crease to tuck the corner neatly between both layers of the bill. Repeat with the lower right corner.
- Fold the top layer down, leaving a triangular flap underneath. Flip the shape over and repeat this step on the other side of the bill.
- Fold the top layer in half, ensuring both sides are symmetrical. Flip the figure and repeat this fold on the other side.
- Voila! Your stylish dollar bill origami pants are ready to display.
Crafting your own dollar bill origami pants is an easy and enjoyable way to add a touch of creativity to your day. Explore the best ways to fold and create these miniature garments, turning a simple dollar bill into a work of art!
MORE EASY DOLLAR BILL ORIGAMI TUTORIALS FROM KIDS ACTIVITIES BLOG:
- Dollar Bill Origami Heart
- Dollar Bill Origami Dog
- Dollar Bill Origami Santa’s Hat
- Dollar Bill Origami Christmas Wreath
- Dollar Bill Shirt Origami
- Dollar Bill Origami Bow Tie
- Dollar Bill Origami Fish
- Dollar Bill Origami Diamond
Did you enjoy making these dollar bill origami pants?


0